Introduction
A clean and well-functioning vacuum is essential for maintaining a spotless home. The Shark Vacuum Rotator brush plays a crucial role in this process, as it helps to pick up dirt and debris from carpets and floors. However, over time, the rotator brush may become damaged or clogged with debris, which can affect your vacuum’s performance. In this guide, we will walk you through the process of replacing the rotator brush on your Shark Vacuum, ensuring that your vacuum continues to work at its best.
A. Overview of the Shark Vacuum Rotator Brush
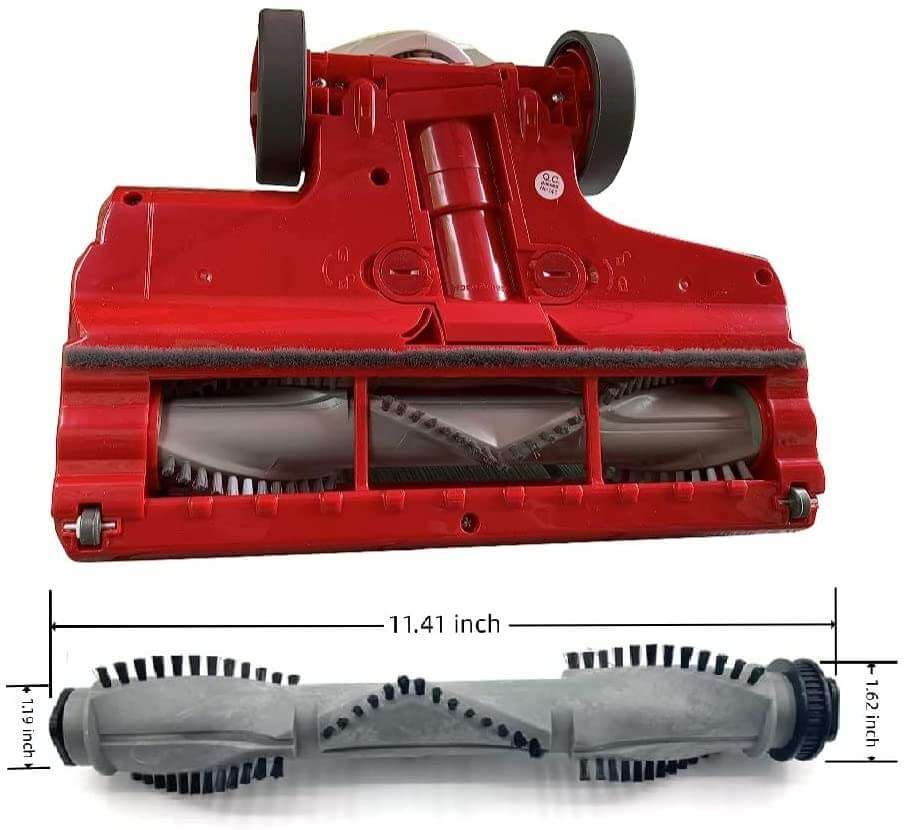
The rotator brush is a cylindrical brush located at the base of the vacuum cleaner. It spins rapidly when the vacuum is in use, helping to dislodge and pick up dirt and debris from carpets and other surfaces. Over time, the bristles on the brush may wear down or become clogged with hair and other debris, which can reduce the vacuum’s cleaning efficiency. Replacing the rotator brush is an easy and effective way to restore your vacuum to its optimal performance.
B. Reasons to Replace the Rotator Brush
There are several reasons why you might need to replace the rotator brush on your Shark Vacuum:
- Damaged or worn bristles: Over time, the bristles on the brush may become damaged or wear down, which can reduce the vacuum’s cleaning efficiency.
- Clogged with debris: Hair, string, and other debris can become tangled around the brush, causing it to become clogged and less effective at picking up dirt.
- Broken or cracked brush: If the brush itself is broken or cracked, it may not spin properly, reducing its cleaning power.
If you notice any of these issues with your vacuum’s rotator brush, it’s time to replace it.
Preparation for Replacement
A. Gather Necessary Tools
Before you begin the process of replacing the rotator brush, gather the following tools:
- Phillips screwdriver
- Flathead screwdriver or another wedge-like tool
- Torx screwdriver (if needed)
B. Unplug Vacuum from Power Source
For your safety, unplug the vacuum from the power source before beginning any maintenance work.
C. Remove Canister
To access the rotator brush, you will need to remove the canister from the vacuum body. Press the lift-away button and pull the handle up to separate the body from the wand section.
Remove Old Rotator Brush
A. Unscrew Fasteners
Using a Phillips screwdriver, remove the 13 screws (circled in yellow) that secure the base of the vacuum. If your vacuum model has a Torx head screw (circled in red), use a Torx screwdriver to remove it. Some models may have a Phillips head screw instead.
B. Detach Belt from Motor Shaft
Once the screws have been removed, gently lift off the vacuum’s base plate to reveal the rotator brush and belt. Carefully slide the belt off the motor shaft, taking care not to damage any components.
C. Disconnect Connectors
Next, remove the nine 16 mm screws using a Phillips #2 screwdriver. Press on the side tabs in the middle of the panel and pull up to reveal the screw under the hose connection. Remove the horizontal screw (circled in orange) that attaches the gray side panel – this is necessary to remove the white cap on the roller brush in the next step.
D. Remove Old Rotator Brush
Use a flathead screwdriver or another wedge-like tool to carefully remove the white cap from the end of the roller brush. With the cap removed, you can now slide the old rotator brush out of the vacuum.
Install New Rotator Brush
A. Connect Connectors
Before installing the new rotator brush, make sure that all connectors are properly connected. This will ensure that the brush receives power from the vacuum’s motor when in use.
B. Attach Belt to Motor Shaft
Slide the new rotator brush into the vacuum, making sure to align it with the belt and the motor shaft. Carefully stretch the belt over the motor shaft and the new brush, ensuring that it is properly seated and not twisted.
C. Screw in Fasteners
With the new brush in place and the belt securely attached, it’s time to reassemble the vacuum. Replace the white cap on the end of the roller brush, then reattach the gray side panel using the horizontal screw (previously circled in orange). Secure the base plate back onto the vacuum using the 13 screws (circled in yellow) and the Torx or Phillips head screw (circled in red).
Put Vacuum Back Together
A. Place New Rotator Brush Into Canister
With the new rotator brush installed and all fasteners securely tightened, you can now reattach the canister to the vacuum body. Make sure that the brush is properly seated in the canister and that there are no obstructions.
B. Reattach Canister to Vacuum
Press the lift-away button and slide the handle back down, reconnecting the wand section to the vacuum body. Ensure that the canister is securely attached and that all components are properly aligned.
C. Plug Vacuum Back into Power Source
With the vacuum fully reassembled, plug it back into the power source and test its performance. The new rotator brush should spin smoothly and efficiently pick up dirt and debris from your floors and carpets.
Conclusion
Replacing the rotator brush on your Shark Vacuum is a straightforward process that can greatly improve the vacuum’s performance. By following this step-by-step guide, you can ensure that your vacuum continues to provide optimal cleaning power for your home. Regular maintenance and timely replacement of worn or damaged components will help to extend the life of your vacuum and keep your floors looking their best.

